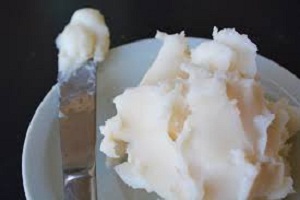
How to Render Lard to be Snow White and Odorless
How to Render Lard is now an obsolete topic because our skinny passionate culture is reluctant in using it for fear of adverse health effects.

Animal fats are considered the “un-healthy” fat; and people alternatively turned to vegetable oil which unknowingly has caused us more harm than good.
Some Fats Are Good For You: How to Render Lard
Note that our bodies require saturated fats. We need them to absorb calcium and vitamins like D, E and A
Fat from a pastured animal is a mixture of saturated, polyunsaturated, and monounsaturated fatty acids.
This is the same fatty acid in olive oil and commended for its health benefits, which includes lowering the risk of heart disease among others.
Despite the stigma, one of the many benefits of purchasing pastured pork is that the meat will not only be rich in vitamins, but it will also be rich in omega 3 fatty acids.
Besides the health benefits, the flavor will be unlike any “white meat” you have ever had.
Also, pork fat doesn’t turn rancid easily because it contains low level of polyunsaturated fatty acid and is very heat stable, making it great for frying.
Classifications of Pigs: How to Render Lard
There are 2 different categorizations of pigs namely lard breeds and bacon breeds.
Lard breeds are useful in producing lard, cooking fat, and mechanical lubricant.
While bacon pigs were long, lean, and muscular, they grew more slowly with more muscle than fat.”
Where Can I Buy Pork Lard Or Pork Fat?
It’s very important to buy pork fat from a family farmer, and render it yourself instead of buying from the grocery store where it is hydrogenated and filled with preservatives and chemicals.
The process is easy and has been done traditionally for centuries.
However, before proceeding, it’s important to learn about the different types of fat from the pig/hog/swine to render each appropriately.
Knowing Your Pig-Types of Fat from a Hog
- Back Fat or Fatback– This is the fat that comes from the back of the animal together with its shoulder and rump.
- Belly– The pork belly. Soft and firm fat layered with meat.
- Leaf Lard– Leaf lard is the fat from around the pig’s kidneys and the cleanest fat on the animal. It is therefore the crème de la crème of pork fat.
Nonetheless, rendering lard may be easy can take repetition to get it just right. Especially if you want to make snow white, odorless leaf lard.
How to Render Lard Snow White and Odorless
Rendering lard is simply heating up the pork fat slowly so that it melts and removes itself from anything else within the fat.
Instructions
Here I will outline the simple and easy steps in the age-old process of rendering your natural pork lard from unprocessed pork fat.
This process will take about 2 to 8 hours depending on the level of heat that your crockpot puts out and the amount of lard you choose to render.
You will need:
- Leaf fat or kidney fat from pigs
- ¼ cup of water
- Slow cooker or large pot
- A sieve (or some cheesecloth)
- Some mason jars with lids (the wide mouth kind works best)
Method
- Firstly, start with cold fat because it’s infinitely easier to work with. You can freeze the raw fat, and then allow it to partially thaw before you start cutting.
- Secondly, cut off the big chunks of meat or kidney remaining in the fat, then cut into small pieces, or run it through with your food processor or meat grinder.
- Please note that the smaller the bits, the faster it will meltdown, and the whiter and “cleaner” your lard.
- After that, add ¼ cup water and the ground fat in a slow cooker and set on low.
- Then, allow the fat to render for several hours, stirring frequently.
- Lastly, carefully strain the liquid fat through a piece of cheesecloth and store in glass jars. I keep mine in the fridge, or freezer for long-term storage. It will last a long time in the fridge or freezer.
You can use your pork lard for sautéing or frying. Or if the lard is mild and white, then use it in pie crusts and pastries.
How to Render Lard – Summary
The bits of meat/gristle that rise to the top, leaving clear, liquid fat underneath is “cracklings.”
Throw your cracklings on a cookie sheet and bake them at about 375 F for about 20 to 30 minutes. You can eat them once crispy.
Cracklings are incredibly delicious and protein-rich. Add them to your salad or a pot of green beans or simply snack on them throughout your day.


